
When it comes to printers, there are a number of options available on the market. From inkjet to laser to thermal, it can be tough to know which type of printer is the best fit for your needs.
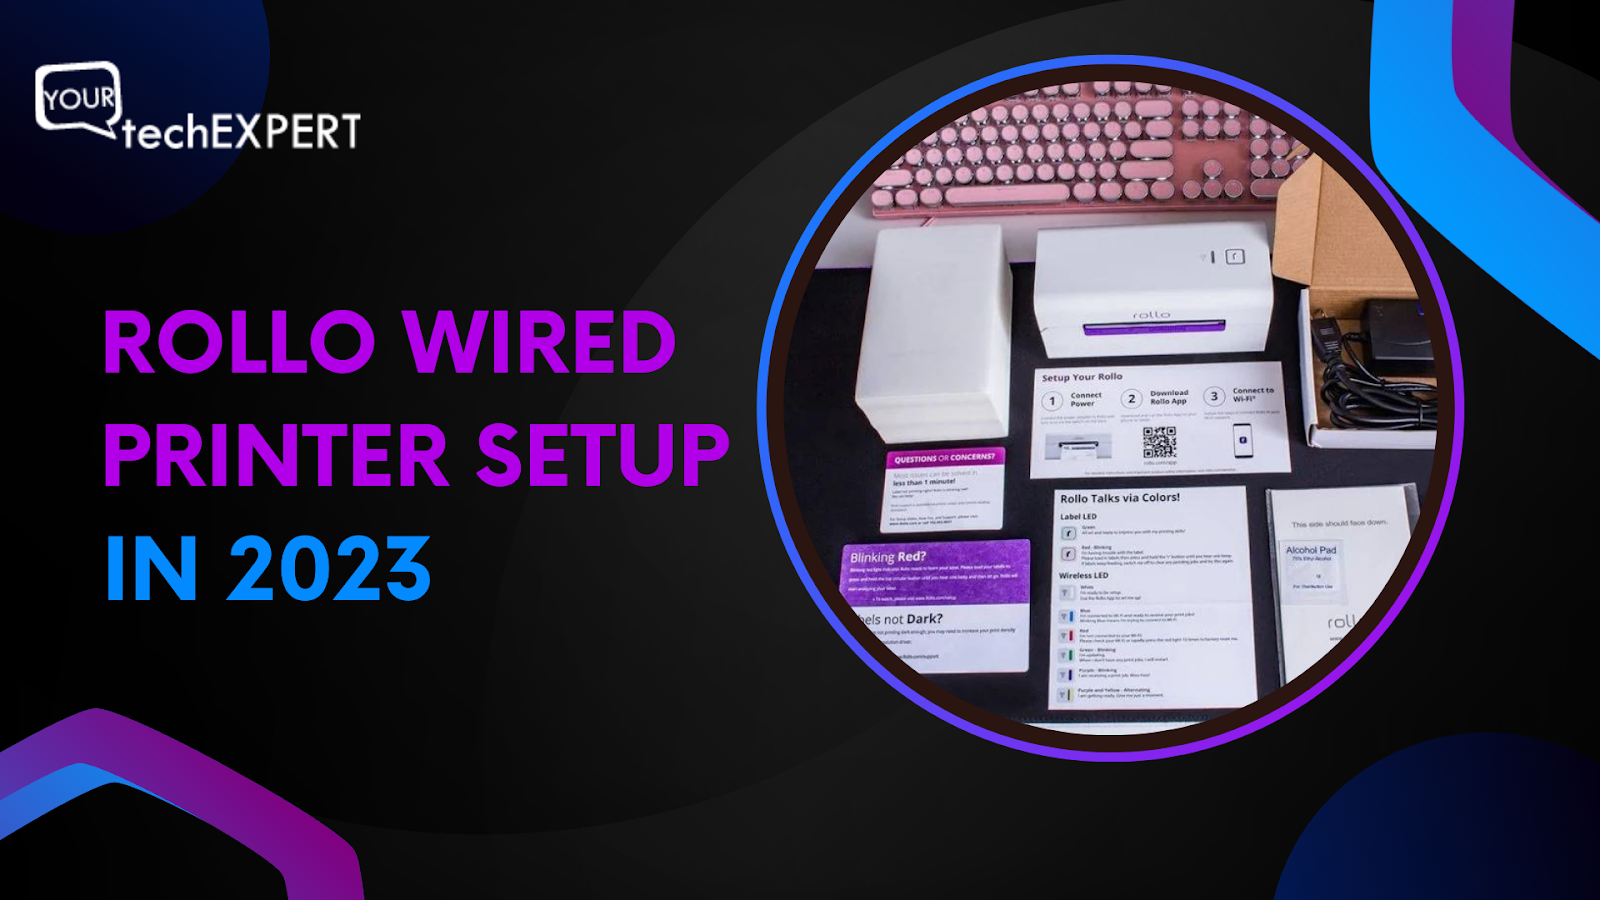
One brand that has gained a reputation for producing high-quality thermal printers is Rollo. In this article, we'll delve into the world of Rollo printers and discuss the steps involved in setting up one of their wired models. This “Rollo Wired Printer Setup” guide is all you need to get your Rollo printer up and ready to go.
But first, a little background on Rollo. Rollo is a leading producer of thermal printers, with a range of models suitable for a variety of applications. Rollo printers are known for their durability, ease of use, and low cost of ownership, making them perfect for small businesses and independent entrepreneurs.
Let’s now get straight into the setup process.
Requirements For Setting Up Rollo Wired Setup
First, you'll need to make sure you have all the necessary resources available. Make sure you have the following on hand.
A Rollo printer, of course, is what you are going to set up today.
A computer with an available USB port, well, that is not even a requirement you need to fulfill; all printers come with USB ports these days
Power cord and USB cable, it comes included with the printer.
A Stable Internet Connection for you to download drivers with.
Downloading the Drivers
If you are pondering if there is a need driver to be installed on your computer, we shall answer that for you. Drivers are software that helps devices communicate with each other. Without them, various components become directionless when it comes to sorting info sent by every device, hence halting communication. That is why drivers are necessary.
Now that we have made you well-educated on drivers' importance, it's time we move ahead.
Turn on your computer if it is not already done, and make sure your internet is working.
To download the drivers, you need to head over to Rollo’s official website. Search “Rollo driver install” on your search engine and click the first link. You can’t alternatively click the link we have provided you below.
Once on the website, find the “Printer Setup Guide” button and click it.

Then click on the “Wired printer” option.
You will find in-depth video tutorials on installing and setting up the Rollo printer; you can watch them if you want. However, we are already guiding you through the process right now, so we don’t think you would need to watch it. You can come back and watch it in case you get confused midway.
Skip the video tutorial and jump right into the "Install Driver" tab. Choose your platform and click the download button.
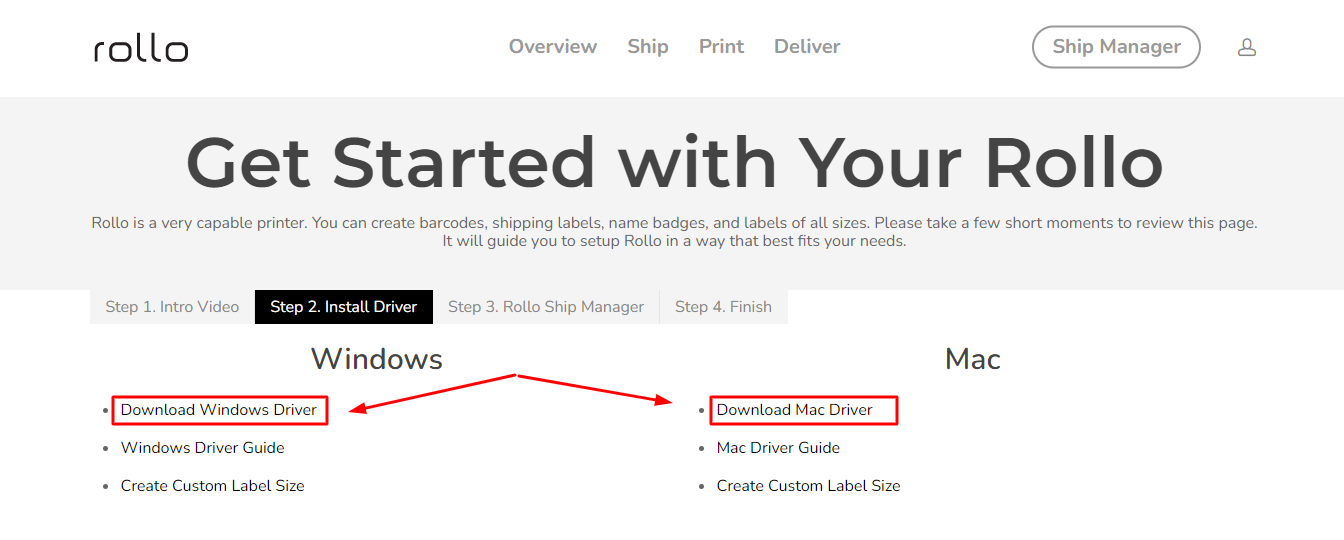
This should start the download process.
Installing The Printer Drivers
Once the file is downloaded, you will need to locate it in order for you to be able to install it. Locating the file depends on your browser and operating system. In case you have left your browser settings untouched, you should find the file in the default download location.
You will eventually need to connect the Rollo Wired Printer to your computer; you can do it right away or after installing the drivers. Don’t worry we will guide you through that as well; find it in the upcoming section.
To locate the downloaded file, click on the triple dots or triple lines. You should find those located in the top right corner of your browser.
Locate the file and double-click.
In case you are wondering why the file is a .zip file. Well, it is placed inside an archive for safety reasons; extract it, and you should find the .exe file.
Once the “Rollo Installation wizard” is open, follow the on-screen instructions. And that should install the Rollo wired printer drivers on your computer.
Setting up the Rollo Printer Setup
You should now notice the Rollo printer in your Device management now that your drivers have been updated. You may validate this by navigating to the Control Panel, then Devices & Printers.
Now, right-click on the "Rollo Printer" and select the "Printing options" option.

Upon doing that, a window named “Rollo Printer Printing Preference” should be opened. On the “layout” tab, click “Advanced.”
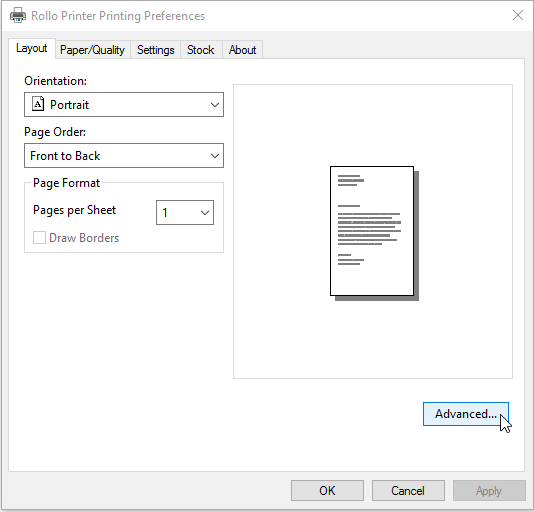
Now, from the drop-down option, pick the label size and click Okay. This should configure your printer, and you should be ready to print.

Connecting Your Printer
Let us see how you safely connect your printer to your computer.
Step 1. Make sure your Rollo printer is turned off before moving ahead. Connect the power to your Rollo printer. Upon doing that, connect it to the wall.
Step 2. Take the USB cable out and connect one end to the Rollo printer and the other to your computer. You will have no trouble doing that because both ports are different, and you will surely know where to insert this one.
Step 3. Now insert the fanfold upon opening the upper lid or the printer.
Step 4. You now need to press and hold the only button on the Rollo printer that should identify the fanfold size. With this, your Rollo wired printer setup is complete.
Conclusion
And that's it. With these simple steps, you'll have your Rollo wired printer up and set up hassle-free. If you face any issues along the way, don't hesitate to refer to the user manual or contact Rollo customer support for assistance. We hope you loved the “Rollo Wired printer setup” blog and found awesome value in it. We will see you soon.
Source:-Guide to Rollo Wired Printer Setup in 2023
Visit:- Easy Guide Rollo Printer [Types and Setup]
Visit Sites :- https://theyourtechexpert.blogspot.com
https://sites.google.com/view/yourtechexpert